This card was one of the ones I sent to family and friends. I am sure they would have received them by now. I love using Crumb Cake cardstock and I was quite pleased at how this one turned out.
As I said I used Crumb Cake for the base card and cut out another piece for the front. I stamped Tree Rings in Crumb Cake. I then cut a piece of Merry Music DSP 7x10cm and lined each side with the discontinued glitter tape. I cut a gold Foil Snowflake in half and adhered it to the back of the DSP. This piece is then adhered to the card front. The trees have been cut out using Old Olive and the Seasonal Tag Framelits. A scrap piece of Real Red cardstock adhered to the underside of the trees. The middle tree was placed using Dimensionals and the other two glued. Stamp the image from Snowflake Sentiments first in Versamark then Real Red. Emboss with Clear Embossing Powder. Punch out sentiment using the Everyday Label Punch. Punch another with Real Red CS and cut in half and adhere a piece to each end and mount with Dimensional. I used a Mini Glue Dot to adhere the Mini Gold Sequins under the sentiment.
I hope you like my card. Merry Christmas everyone. 🎄
Showing posts with label Christmas. Show all posts
Saturday, December 23, 2017
Sunday, September 30, 2012
Christmas Wreath
Hello everyone. I promised a project post. This project was inspired by Carolyn King when she did a demo at the Perth Heartfelt Event 2012. I came home and wanted to get into it but we had to go away that night after the event. I managed to have a whole weekend to myself some weeks later and this is what I came up with. I really was going to make one the same as Carolyn's but then thought I wanted to do something a bit different. A wreath came to mind and I was going to use the gorgeous new Tulle but then thought that would be too floppy. I decided to make my own bow. First of all I used some of the card which is at the back of the DSP. I drew a circle and then made the pattern for the wreath. Using a blade I carefully cut the shape out. I then covered it with Be Of Good Cheer DSP and then used the sanding blocks to neaten it up. I cut out a post it note to make the shape to sponge around the wreath. I then hand drew the bow and placed DSP over it and sanded the edges and again using a post it note to sponge around to finish it off.
You will need the Petal Card Double punch to make your little boxes. You will need two cut outs to make one box leaving the top open. Carolyn used Brads to close her boxes but I have used Bakers Twin (Cherry Cobbler). I wont be putting anything in the boxes as I just want to use the wreath as an ornament. I have used the 25 & Counting Stamp Set for my images on the boxes. I used my 1" square punch to cut out the Silver Glimmer Paper. To get the right shape of my images I just used one of them that has a square shape and cut around it and used it as a template. (hope that makes sense). It was very easy. I have taped them to the wreath with the Sticky Red Tape. I had a lot of fun making my wreath, especially as I had the weekend to myself and I watched a few movies at the same time.
We had a lovely day at Ngaire's yesterday with a get together of more than 20 fellow SU stampers. We all made each others swaps and we took home over 20 cards each. I was very impressed with the quality of the cards we made. We have some very clever ladies to share our ideas with. This was my swap which was inspired by Ngaire Anderson at the Heartfelt Event. I used Be Of Good Cheer DSP. I love this paper and have had to order another pack as it is so bright and colourful. I also used the Two Tags Die and the lovely stamp set we received from the Heartfelt Event, Heart of Christmas. I gave it a little shine with some Dazzling Diamonds and finished it off with a bow made from the Bakers Twine. I do hope you like my projects and I am sorry to say but I am off to bed. Its been a long day as we travelled 3 hours today to visit our Grandson for his 14th birthday and then travelled the 3 hours back home again. So its goodnight from me and I hope to come back soon. Thanks for popping by :)
Thursday, July 26, 2012
CATCH UP!
![]() |
| This is a cute little 3"x3" card made of Vellum |
Anyway I am here now and have quite a few cards to put up so I hope you enjoy browsing.
![]() |
| Cased from Heather Tiley |
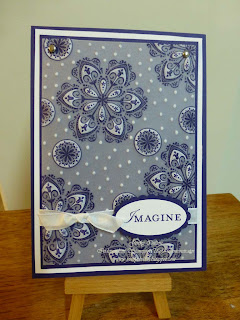
This card was made using the following:-
Cardstock - Vellum Card, Whisper White, Crushed Concord (one of my favourites and sadly leaving us at the end of August)
Stamp Sets - Mixed Bunch, Loving Thoughts (both from Autumn Winter Mini)
Ink Pads - Concord Crush
Accessories - Whisper White Ribbon, Scallop Oval Punch, Oval Punch, Brads, Stylus from the Simply Scored Scoring Tool (to rub on the underside of the stamped vellum to raise up the pattern which makes it go a white colour)
Don't you just love it? You just have to make this card as it looks better in real life.
I have also made a few extra cards using the same technique but using Real Red Cardstock and Inks.
In these cards I have used Snow Swirled and Tree Trimmings Stamp Sets.
![]() |
| Real Red CS, Vellum & Snow Swirled Stamp Set |
![]() |
| Using Real Red and Tree Trimmings Stamp Set |
I guess its Christmas in July now so not so early for Christmas Cards. At least getting a head start for December!

The next few are using Glossy Cardstock. I was asked by my group of ladies for different ideas on how to use the Glossy CS. Here are just a few ideas.
The first one is one of my favourite techniques. First of all you need to cut out your piece of cardstock (Glossy) and go over it with your Brayer using More Mustard. Using your Sanding Block rub in one direction back and forth over the cardstock. Once you have gone from one end to the other then turn around clockwise once and start sanding the opposite way from one side to the other.
You then stamp with Music Notes Wheel with Basic Black. I have also added some Real Rust Ink (discontinued) using the Extreme Elements Stamp Set. Go over the image once again with the Sanding Block until you have a feint image before you. I have cut out a circle with Basic Black CS for the record using the Circles #2Dies and the image from Grunge Rock as well as the guitar. I have used the Dotted Scallop Ribbon Border Punch for around the image and placed it on some DSP and Real Rust CS then Basic Black CS. I quite enjoyed making this card. I hope you like it.
The next one is using up your scrap pieces of Glossy Cardstock embossing with the Petals A Plenty Embossing Folder. I have used Tempting Turquoise and Tangerine Tango Cardstock and Ink. Using a sponge gently go over the embossed area which highlights the pattern. The punch I used is actually discontinued but I had forgotten at the time. Sorry!
A very simple card but quite effective.
The next card I used Lovely As A Tree and I also cased this one. I am so sorry as once again I cannot find the name of the talented person who I cased it from. First of all cut your piece of Glossy Cardstock to the size you wish. Run over with your Brayer using Daffodil Delight. You will need to tear a piece of paper a lay it about 1/4 of the way up from the bottom and using your brayer this time with Pumpkin Pie Ink go over the cardstock for the remaining 3/4 of the card. Lift up your piece of paper and move it to about halfway and go over again with your brayer but this time using Soft Suede Ink. For the last time lift up your piece of paper and move it again to approx 1/4 of the way from the top and go over with brayer using Bravo Burgandy. You can then use Versamark and Black Embossing Powder to place your Lovely As A Tree image onto your card. I have torn the sides of the card for a bit more texture.
I have made two cards the same here using the same technique but one is with Confetti Cream cardstock and the other with Glossy Cardstock. I have used Versamark on each cardstock and embossing with clear embossing powder using Mixed Bunch Stamp Set (leaving us at the end of August, hopefully to join us in the new Catalogue - only hoping) When using the heat gun on this technique you need to heat it enough to make the raised layer disappear. It takes a lot longer on the Glossy Cardstock but not so long using the Confetti Cream. You need your image to look like it has an oil effect and you could possibly see the image on the other side of the cardstock. Using your daubers choosing your colours go over the images. I have used Concord Crush, Pumpkin Pie and Tempting Turquoise. It gives your card a Batik look.
I was asked to make a card for my boss as it is their 25th Anniversary of their business. I thought and thought of what to do. I could not make it too fussy as it was for a man and a woman. I finally came up with the balloon idea and the sentiment The Sky's The Limit and this is what I came up with. I saw Tara Bilbao's card using the same stamp set and drew my idea from that. Thanks Tara! The card is actually an A5 size and inside I used whisper white and sponged the clouds all over. I placed an extra piece of cardstock so that there was enough room for all of the staff's good wishes. They loved it!I was also asked to make a card for one of our staff for his 60th birthday and this was what I came up with. I saw the tag idea in the Summer Mini Catalogue using the gorgeous Open Sea stamp set. I hope this one makes it to the new Catalogue in September too. I also used the DSP Nautical Expedition from the Summer Mini Catalogue. This card is an A4 size as there were to be quite a few people coming along to sign the card.
I have been having a look on Pinterest. Check it out as there are lots of ideas on there and not just cards and crafts. There are all sorts of categories such as Cooking, Renovations, Clothing etc. This is where I found my next card. Yes I have cased this one too but using a different colour and stamp set. The designer of this card is the very talented Paula Dobson. Her card is gorgeous, obviously the reason why I love it so much. We used this card for my last workshop. A very simple but effective card. Check out Paula's blog for her card. I actually used Crumb Cake for my workshop but had mine on show for a different colour.The last few cards are using the Framelits Labels Collection from the Autumn Winter Mini Catalogue. I found these ideas on you tube. The first one (Flip Flop Card) was found here and the second one (Framelit Funfold Card) was found on this site.
Its great that we can look up the tutorials on You Tube and watch them step by step and pause when you want to. I tend to watch the video first writing down the measurements then watching again and pausing as I go to make the card. The Pumpkin Pie card below is a very simple one and can be made quickly for that birthday you almost forgot for that someone special.


Well I guess I had better get off to bed. Its almost midnight and I start work at 7.30am tomorrow. It is to be 2 degrees tonight so it will be nice to snuggle up in our lovely warm waterbed.
I hope you have enjoyed this post. I know its a long one but I had to catch up. I will try to promise to post at least once a week from now on. I am going to have to designate a night when I actually post.
Dont forget the Autumn Winter Mini is almost finished. You have until 31st July to put your orders in. Remember we cannot guarantee that any of the products in the mini will appear in the new Catalogue in September.
So from me its bye for now and thanks for popping by:)
Monday, November 28, 2011
CHRISTMAS IS JUST AROUND THE CORNER!
Hello there! I am here at last. It has been a whole month since I have updated my blog. I am so sorry about that. I just have been so busy as I am sure you all have. This time of year is just crazy. One of the highlights in the past month was to see Dolly Parton in her Better Day tour. What an entertainer! The minute she was on the stage she had the crowd going. First song was Jolene so we were all pumped and singing away. For 62 years of age she has still got what it takes.
Our eldest grandson has been accepted into Guildford Grammar School and he had his orientation sleepover last weekend. I went along with our daughter and spent a good deal of time at the school on the Sunday and Monday. Our grandson seemed to have enjoyed his stay and was quite chatty on the way home with all the news of what went on. I guess we will have a few trips back and forth to visit and pick him up over the next five years.
The first one is the Side Spring Card. I cased this idea from Beate Johns from Splitcoast Stampers. A lovely clever little idea. You can find the tutorial here. I have adjusted the sizing because as you know our A4 cardstock is of a different size than the American one. (unless you are using 12 x 12) I have cut mine down so that I can get two cards from one A4 sheet of cardstock. Have a look at Beate's gorgeous baby card that she made.
We had a lovely evening at our last Stamparoo get together at Ngaire's. It was our last one for the year and the time just goes and there is never enough time to catch up with everybody. Before we know it its time to go home. Pat Carr brought along some lovely projects she had been working on for her daughters wedding which was last weekend. Pat had made these gorgeous Placecard holders in Black, Pink and white. Of course everyone just loved them and soon Pat was making little templates so that we could go home and make them. We promised we would not put them on our blog until after the wedding. Well now it is after the wedding and I am about to put my cased placecard on my blog. I decided to stick to the Christmas theme. I must stress that the pattern idea came from Pat. (very talented lady). Thanks Pat! My ladies at yesterday's workshop loved them. I too was doing templates for them. For my placecards I have used the following:-
Cardstock:- Old Olive, Cherry Cobbler, Very VanillaInk Pads:- Old Olive, Cherry Cobbler (sponging)Accessories:- Big Shot, Petals A Plenty embossing folder, 5-Petal Punch (for flower & leaves) Unfortunately I do not have the punch for the middle flower so I cut that out by hand. Champagne Shimmer Paint mixed with alcohol. Computer to print out name. The cardstock is 12cm x 6 cm. Base card for name is 4.2cm x 7.2cm. Glue or tape left side at the bottom and fold top left corner down to front. Glue or tape bottom right side and fold left side over to right side. This will form a pocket. The top right coner does not get glued down. This one forms the other leg to hold the card holder up.
For my last project I had seen this on Splitcoast Stampers and it was by Brenda Quintana. My hostess wanted to do gift tags and Christmas cards for her workshop so I went online checking out all sorts of tags I could find. I came across this idea and thought it would be great for a little gift for her. You can find the tutorial here. Imagine the possibilities with this little project. Birthdays, Christmas, Note card holders etc. I have used the following items for this project.
Accessories:- Crochet Trim Victoria, Crop-o-dile, Champagne Mist Shimmer Paint mixed with Alcohol. I bought some old tassels and broke them up and used the strains of cotton for the tags. Well I guess thats about it for me. I am off to put my thinking cap on for my next workshop. Hopefully will be back to update my blog in no time at all. Its been a lovely weekend. The weather has been just perfect. They forecast rain tonight and you know how much I love the rain. Hopefully it will help the fire victims down south near Margaret River. My thoughts go out to them. What a horrible shame. Its not even summer yet.
Our eldest grandson has been accepted into Guildford Grammar School and he had his orientation sleepover last weekend. I went along with our daughter and spent a good deal of time at the school on the Sunday and Monday. Our grandson seemed to have enjoyed his stay and was quite chatty on the way home with all the news of what went on. I guess we will have a few trips back and forth to visit and pick him up over the next five years. I've had a few workshops so prepping has taken a lot of priority over my time which I love. Isn't it great when you HAVE to spend time doing something you LOVE! If only everyone could do what they love for a living. Well I guess I had better make up for lost time and put a few extra pics and ideas on my blog.
First of all here are the projects we made at our last workshop.The first one is the Side Spring Card. I cased this idea from Beate Johns from Splitcoast Stampers. A lovely clever little idea. You can find the tutorial here. I have adjusted the sizing because as you know our A4 cardstock is of a different size than the American one. (unless you are using 12 x 12) I have cut mine down so that I can get two cards from one A4 sheet of cardstock. Have a look at Beate's gorgeous baby card that she made.
We also made this patchwork card. I have seen this card a few times on various blogs and it didnt really catch my eye until one of my customers showed me a card she had made. Hers was of a similar nature and I thought "well if you like that one then you will like this one". So I decided to alter it to a christmas theme. For this card I have used the following:
Cardstock: Old Olive, Early Espresso, Whisper White Ink Pad: Early Espresso
DSP: Letters to Santa
Accessories: Big Shot, Petals A Plenty, Dotted Scallop Ribbon Border Punch, Scallop Circle Punch.
The Early Espresso cardstock measures 6.2 x 6.2cm (cut 2)
DSP measures 3.2 x 3.2cm (cut 8) If it is a patterned DSP be sure your pattern goes the same way as you place each piece down. A great way to use up all that scrap DSP.
This card is very easy and quite affective. I hope you like it.
Our next project was Susan Joyce's swap at our Stamparoo Stamp Camp. This was one of my favourites and of course all the girls loved it. I did not have the stamp or ribbon that Susan used but it still looks nice. For this project I have used:-
Cardstock:- Early Espresso, Very Vanilla, Crumb Cake
Ink Pad:- Early Espresso, Versamark
Stamps:- Delightful Decorations, Beautiful Season
Accessories:- Dauber, Big Shot, Vintage Wallpaper Embossing Folder, Ornament Punch, Paper Piercer, Gold Embossing Powder, Heat Gun, Pearls
We had a lovely evening at our last Stamparoo get together at Ngaire's. It was our last one for the year and the time just goes and there is never enough time to catch up with everybody. Before we know it its time to go home. Pat Carr brought along some lovely projects she had been working on for her daughters wedding which was last weekend. Pat had made these gorgeous Placecard holders in Black, Pink and white. Of course everyone just loved them and soon Pat was making little templates so that we could go home and make them. We promised we would not put them on our blog until after the wedding. Well now it is after the wedding and I am about to put my cased placecard on my blog. I decided to stick to the Christmas theme. I must stress that the pattern idea came from Pat. (very talented lady). Thanks Pat! My ladies at yesterday's workshop loved them. I too was doing templates for them. For my placecards I have used the following:-
Cardstock:- Old Olive, Cherry Cobbler, Very VanillaInk Pads:- Old Olive, Cherry Cobbler (sponging)Accessories:- Big Shot, Petals A Plenty embossing folder, 5-Petal Punch (for flower & leaves) Unfortunately I do not have the punch for the middle flower so I cut that out by hand. Champagne Shimmer Paint mixed with alcohol. Computer to print out name. The cardstock is 12cm x 6 cm. Base card for name is 4.2cm x 7.2cm. Glue or tape left side at the bottom and fold top left corner down to front. Glue or tape bottom right side and fold left side over to right side. This will form a pocket. The top right coner does not get glued down. This one forms the other leg to hold the card holder up.
For my last project I had seen this on Splitcoast Stampers and it was by Brenda Quintana. My hostess wanted to do gift tags and Christmas cards for her workshop so I went online checking out all sorts of tags I could find. I came across this idea and thought it would be great for a little gift for her. You can find the tutorial here. Imagine the possibilities with this little project. Birthdays, Christmas, Note card holders etc. I have used the following items for this project.Cardstock: Early Espresso, Marina Mist, Whisper White, Old Olive, Real Red.
Ink Pad: Early Espresso, Old Olive, Marina Mist, Real Red
DSP: Letters to Santa
Accessories:- Crochet Trim Victoria, Crop-o-dile, Champagne Mist Shimmer Paint mixed with Alcohol. I bought some old tassels and broke them up and used the strains of cotton for the tags. Well I guess thats about it for me. I am off to put my thinking cap on for my next workshop. Hopefully will be back to update my blog in no time at all. Its been a lovely weekend. The weather has been just perfect. They forecast rain tonight and you know how much I love the rain. Hopefully it will help the fire victims down south near Margaret River. My thoughts go out to them. What a horrible shame. Its not even summer yet. I will leave you with various Christmas gift tags I have made, some of them cased from various blogs and others my own design. Bye for now and thanks for popping by :)
Monday, October 17, 2011
October 11 Workshop
Hello once again,
Well Christmas is drawing closer and closer and other than making Christmas cards at my workshops I have not really thought about it. I see the christmas decorations are all out in the shops. I swear each year slips by faster than the year before.
Our October workshop went well. We made a Christmas decorative gift box which was made with the Mini Milk Carton Die. Susan Joyce showed us how to make the little gift box with the lid which prompted me to make this little item. I noticed that Susan had also shown these on her blog previously and I found the instructions on how to make it on KB Papercrafts. You can adjust the size of your box as well so you can have it tall or short depending on your choice. They are so easy to make and once you make one you can make a whole lot ready for your Christmas gifts for work buddies etc. You can see I also made one using Concord Crush & the new Flirtatious DSP.
The next card was one I made using the Well Worn DSP and have put it through the Square Lattice Folder using the Big Shot. (My lovely Big Shot that I received at half price, what a bargain and it is quieter than my old one). This card is very, very simple and one that you can whip up in a few minutes. I used for this card the following products:-
Cardstock: River Rock, Early Espresso
DSP: Well Worn
Stamp Pad: Early Espresso
Stamp Set: Perfect Punches
Accessories: 1/4" Grosgrain Early Espresso Ribbon, Round Tab Punch, Extra Large Oval Punch.
The last card was one I received in the 2011 Convention Swap from the very talented Cathy Clark. I just love the colours. This happens to be one of my very favourite stamp sets, French Foliage and for those of you who know me I just love autumn colours. Unfortunately since this card was made and unknown to me until last night that the Brushed Copper no longer exists.
This card was made using the following products:
Cardstock: Basic Black, Cajun Craze, Brushed Copper, Brushed Gold, Always Artichoke
Stamp Pad: Basic Black
Stamp Set: French Foliage, Heard From The Heart, Woodgrain
Accessories: Word Window Punch, Black Brads.
I really enjoyed making this card and thank Cathy for such a gorgeous idea. Love it!
We always have cuppa and cake at half time and this time once again the girls were guinea pigs with a new recipe. I found this recipe in the free Coles Spring magazine. It was a Pineapple Upsidedown Cake. The recipe was easy but take a tip from me. Do not use a spring cake tin. I dont know why I used it but I lost some of my juice while cooking. Anyway it did not take away the lovely tasting cake that it eventuated into. I think it was one of my best at my workshops. I think the girls will agree as well. The cake did stick slightly in the middle when I turned it out but I managed to salvage it. I am sure you can find the recipe online if you cannot get one from your local Coles store. If not email me and I will send you the recipe.
Well thats it for now for me. I am going to catch up on all the kits I hve left over from over the years instead of having them laying around as they have done. I made 17 cards on Saturday night along with dropping keys off to our son after his trip to Bali. They were there when the Earthquake happened and they said it was very scarey.
Anyway must go. Thanks once again for popping by :)
Well Christmas is drawing closer and closer and other than making Christmas cards at my workshops I have not really thought about it. I see the christmas decorations are all out in the shops. I swear each year slips by faster than the year before.
Our October workshop went well. We made a Christmas decorative gift box which was made with the Mini Milk Carton Die. Susan Joyce showed us how to make the little gift box with the lid which prompted me to make this little item. I noticed that Susan had also shown these on her blog previously and I found the instructions on how to make it on KB Papercrafts. You can adjust the size of your box as well so you can have it tall or short depending on your choice. They are so easy to make and once you make one you can make a whole lot ready for your Christmas gifts for work buddies etc. You can see I also made one using Concord Crush & the new Flirtatious DSP.
The next card was one I made using the Well Worn DSP and have put it through the Square Lattice Folder using the Big Shot. (My lovely Big Shot that I received at half price, what a bargain and it is quieter than my old one). This card is very, very simple and one that you can whip up in a few minutes. I used for this card the following products:-
Cardstock: River Rock, Early Espresso
DSP: Well WornStamp Pad: Early Espresso
Stamp Set: Perfect Punches
Accessories: 1/4" Grosgrain Early Espresso Ribbon, Round Tab Punch, Extra Large Oval Punch.
The last card was one I received in the 2011 Convention Swap from the very talented Cathy Clark. I just love the colours. This happens to be one of my very favourite stamp sets, French Foliage and for those of you who know me I just love autumn colours. Unfortunately since this card was made and unknown to me until last night that the Brushed Copper no longer exists.
This card was made using the following products:
Cardstock: Basic Black, Cajun Craze, Brushed Copper, Brushed Gold, Always Artichoke
Stamp Pad: Basic Black
Stamp Set: French Foliage, Heard From The Heart, Woodgrain
Accessories: Word Window Punch, Black Brads.
I really enjoyed making this card and thank Cathy for such a gorgeous idea. Love it!
We always have cuppa and cake at half time and this time once again the girls were guinea pigs with a new recipe. I found this recipe in the free Coles Spring magazine. It was a Pineapple Upsidedown Cake. The recipe was easy but take a tip from me. Do not use a spring cake tin. I dont know why I used it but I lost some of my juice while cooking. Anyway it did not take away the lovely tasting cake that it eventuated into. I think it was one of my best at my workshops. I think the girls will agree as well. The cake did stick slightly in the middle when I turned it out but I managed to salvage it. I am sure you can find the recipe online if you cannot get one from your local Coles store. If not email me and I will send you the recipe.
Well thats it for now for me. I am going to catch up on all the kits I hve left over from over the years instead of having them laying around as they have done. I made 17 cards on Saturday night along with dropping keys off to our son after his trip to Bali. They were there when the Earthquake happened and they said it was very scarey.
Anyway must go. Thanks once again for popping by :)
Subscribe to:
Posts (Atom)


