Sunday, March 6, 2011

It's The Thought!

Hi Everyone! I have just received my new stamp set 'Its the Thought' and have had a little play. Originally I was not impulsed to choose this set but decided that it could be quite useful. I am actually becoming quite partial to this set. I have only made two cards so far but my mind has a few more ideas. The first one I will be using for Ngaire's monthly swap. We are always looking for simple cards for our workshops and quick cards to make for friends and family and this is one of them. You see this set is actually a hostess set from the Summer Mini Catalogue. You could earn this set for free just by having your own workshop. For this card I have kept to the Brights collection as our monthly swap is themed as Brights Collection.

Items used:
Cardstock - Pumpkin Pie, Real Red, Old Olive, Whisper White
Stamp Set- Its The Thought
Stamp Pad - Old Olive
SU! Markers - Old Olive, Real Red, Pumpkin Pie
Accessories - Paper Piercer, Crystal Effects, Polka Dots Embossing Folder, Scallop Edge Punch, Stamp-a-ma-jig.
You can see I have painted his toenails Pumpkin Pie as the sentiment says 'Enjoy the Journey' and to me that means go all out and paint your toenails.

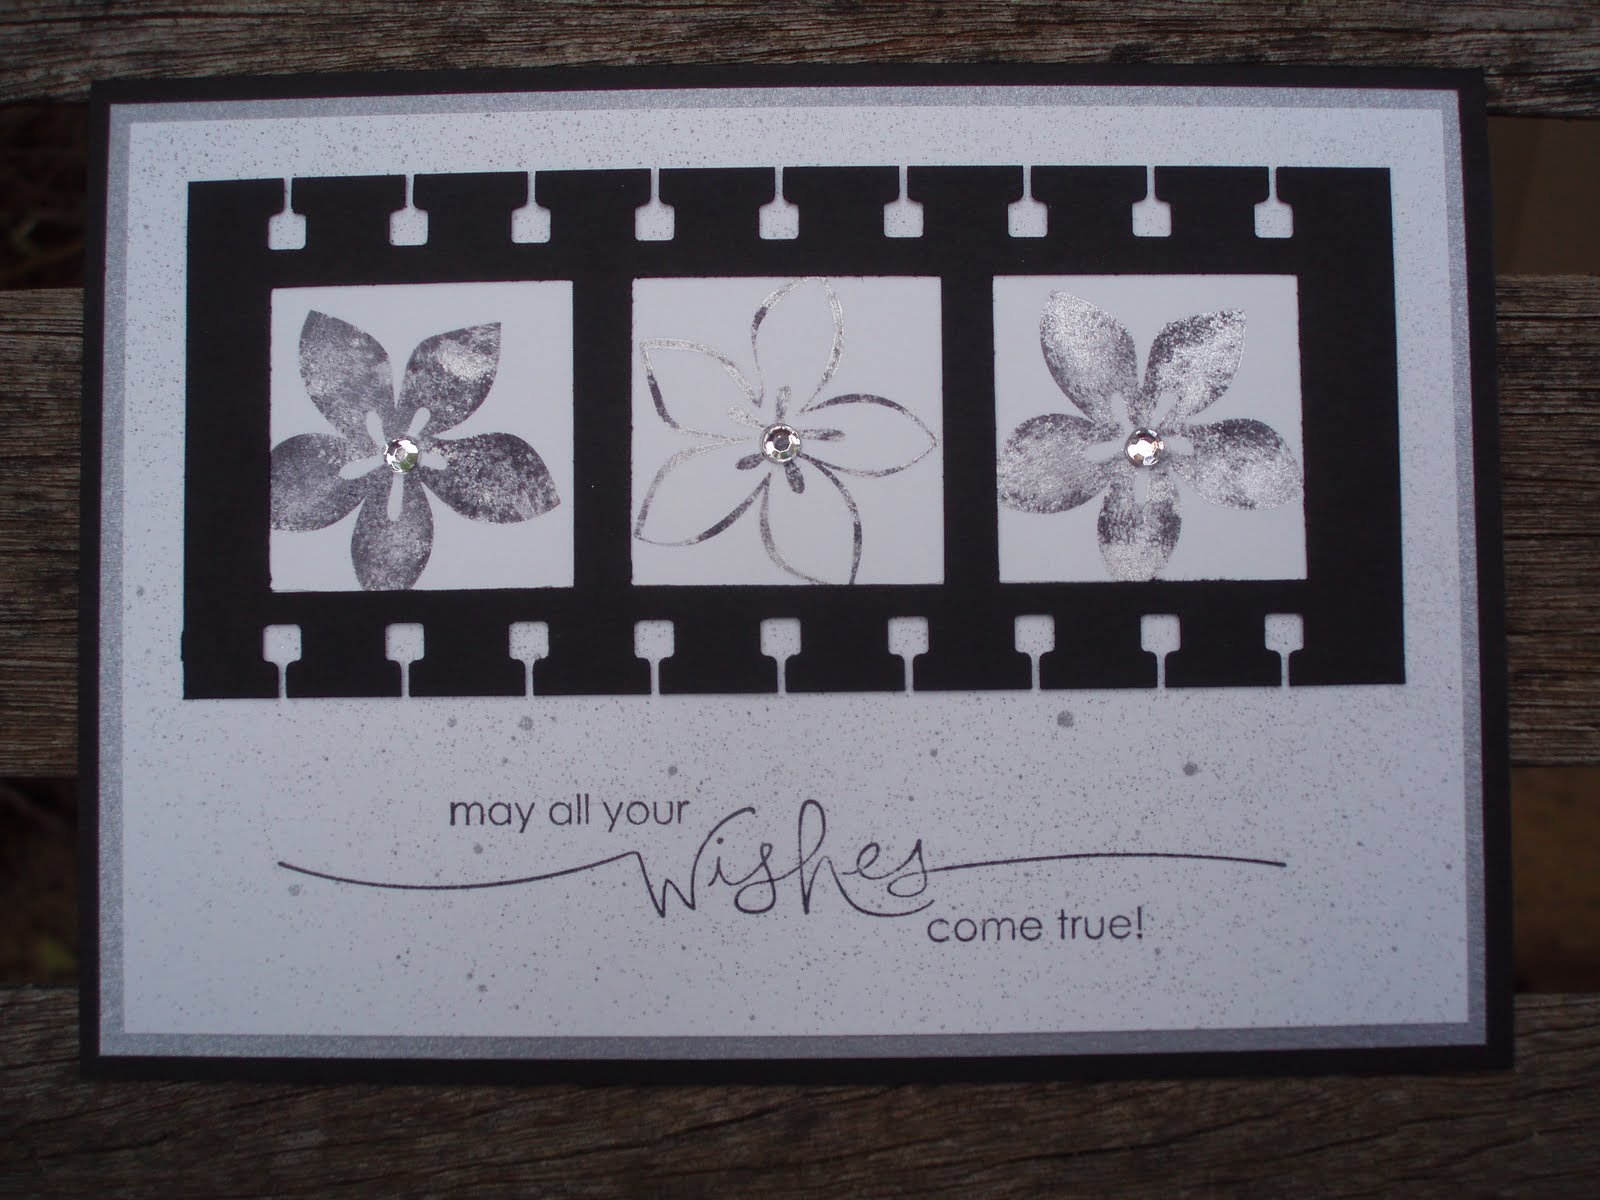
The wedding card is made from the same set of stamps. Using the same idea, I have used Shimmer Paint to stamp my images onto Whisper White cardstock and then giving the middle image some added detail. I used an Aqua Painter dipped into the Shimmer Paint to give the shaded look to the image. I have also used up some scrap ribbon that someone had given to me as part of a wrapped gift. I am sure you all save scraps to use in your projects. You need not have to use the Brushed Silver cardstock as you could always just place some silver ribbon along the edge of the Whisper White.

For this card I have used the following:-
Cardstock - Basic Black, Whisper White, Brushed Silver
Stamp Set - Its The Thought
SU! Marker - Real Red
Accessories - Aqua Painter, Stamp-a-ma-jig, Elegant Lines Embossing Folder, scrap ribbon

Really there are not a lot of supplies you need for this card. This is why I am growing to love this set as you could imagine how many different ideas you could come up with. Even just one little image in the corner of your card would look lovely. You may not have to purchase any of these item if you have your own workshop as you may qualify for all of them free.
Well I am off now to organise myself as I have the family coming over for a BBQ tonight. Its not often we can manage to all be here at the same time. Yes! and the weather will be just perfect today. A bit cooler than it has been. Hooray!!
Thanks for popping by :)

Tuesday, February 22, 2011

Never Ending Card

We are almost through February already. Right now I am thinking of the poor people in New Zealand who have been effected by the earthquake. There has been so much sad news this year. It makes one wonder what is coming next!
On a lighter note, our February workshop was rather productive. We made three cards and one of which is shown here. The Never Ending Card using Trendy Trees. This card is one of the easiest cards you can make. The decorating will take time though, especially if it is your first one. I have used the Stampin' Up! pattern which was illustrated in the February Impressions. The instructions did say that we may have to cut the card down a little. I have altered the measurements so that my ladies did not have to cut it down. I have included the url for the instructions for the Never Ending Card. (www3.stampinup.com/au/documents/folding_instructions_AU.pdf )

The changes I have made are as follows:- Instead of 13.5 x 10.5 I have made mine 12.7 x 10.5cm for each piece. On the bottom layer I have changed the scoring from 3.5cm to 3.1cm on each end. When cutting the two pieces in halves be sure to cut exactly in half and not by the measurement that is there. I do hope this makes sense. You can download the instructions or print them off.

Here is the card that I made. I used :-
Cardstock - Cajun Craze, Not Quite Navy, Whisper White
Stamp Pad - Cajun Craze, Old Olive, Not Quite Navy
Designer Series Paper Pack In Colour (level 1 hostess gift)
Stamp Sets - Trendy Trees, Afterthoughts
Your Stamp-a-ma-jig is a must for this project and I deliberately used it in my last workshop. The ladies certainly enjoyed using it and now realise how much of a valuable tool it can be to help them along with their projects. Sometimes just using the eye does not work and this is when the Stamp-a-ma-jig comes in handy. It has to be my favourite tool from the whole catalogue. If you have not tried one then maybe its time you did as you will love it just like I do.

For the clouds I used the Scallop Circle Punch to cut out the shape in a post it note and then sponged around it to get the cloud effect. I tore up a piece of paper for the outline in the hilly section and sponged the rest with Old Olive. I just love Trendy Trees. This stamp set is great for any gender and can be used in many ways.

The two blank whisper white sections are for your message in the card. You can change the position of this and put it wherever you like. The choice is yours.

I decided this time not to decorate the back of the card. I felt that what we did in our workshop was enough for the girls. I have heard that three of the girls have already gone home to make another Never Ending Card before the weekend was over. I do hope you will give it a try if you have not tried it before. It really is an easy

card to make. Let me know how you go.

Enjoy and thanks for popping by :)


Saturday, February 5, 2011

Just Believe

We are well into the new year. Hasn't it gone by quickly. I find the first three months especially just whiz by. We are feeling the effects from the cyclone here now although the breeze is beautiful and much appreciated I cant help but think of those poor people over east with the devastating weather patterns. I cant believe how much devastation those poor people have gone through. It is so widespread and so many people have been effected. I do hope they are able to pick up the pieces quickly and settle down to life in general soon. I guess we have to Just Believe that this will happen.


Speaking of Just Believe, that is what stamp set I am using to create todays card. I have made this one for a friend whose birthday it is today. I have used the new in colours as well which go lovely together.


For todays card I have used:-
Stamp Set - Just Believe
Cardstock - Very Vanilla, Concord Crush, Poppy Parade, Pear Pizzazz
Ribbon - I did not have Pear Pizzazz ribbon so I used Old Olive
Accessories - Sponge Dauber, Rhinestone, Big Shot with the Top Note Die, Champagne Mist Shimmer Paint directly onto the flowers.
I made up a little spray bottle of Champagne Mist Shimmer Paint.
I put the Very Vanilla and Poppy Parade through the Top Note Die. I cut the Very Vanilla down to the stitch line so that Poppy Parade colour showed when place on top. I then distressed my pieces to give it an added touch. I am usually a clean cut card maker but I know the person I am giving this to likes a bit of the old look. I love the colours all put together, what do you think?


These are the directions for the Champagne Mist in the spray bottle. I bought some Isocol Rubbing Alcohol Antiseptic from the Pharmacy and poured some into a tiny mist bottle (about 7ml). I actually had a mist bottle laying spare in my craft room. I then took the nozzle out of the bottle and pressed down on the spray nozzle (it pushes out the air) and placed the end in the Shimmer Paint and drew up gradually half way up the straw part. I then put five drops of Shimmer Paint into the rubbing alcohol in the mist spray bottle. You can also use an eye dropper for this but I do not own one as yet. I popped the nozzle back on the bottle and gave it a shake and sprayed it onto my cardstock. This gave my card a shimmery look. You can also pop in five drops of your favourite colour for some added touch to your project. I have not as yet bought the Ink refill for Concord Crush or I would have used that one.

If you are having trouble finding some mist spray bottles I have found some in Woolworths. I looked high and low for some but was unable to find any empty bottles but found a two pack of Cleanspray Hand Sanitiser. It was actually cheaper than what I originally paid for the two bottles I had previously bought (cant remember where I got them from though). You will have to use the hand sanitiser before you can use them but they are the same size (7ml). Have a go. Its fun making up the different colours. I love using the Smooch Spritz also but if you want a fine mist then the mist bottle is the way to go. It also gives you the opportunity to use the other colours. A very cheap option.

Tuesday, January 25, 2011

SALE-A-BRATION HAS BEGUN


Yes Sale-A-Bration started today! If you have had your eye on some products from the Stampin' Up! Catalogue or the Mini then its time to order now as you will receive a FREE stamp set from the Sale-A-Bration mini if your order is $100 or more. You could also do even better than this and hold a workshop with a few of your friends and you will surely be eligible for your FREE stamp. By holding your own workshop you get to enjoy cardmaking right from your home. I will bring everything to you. You will be eligible for more FREE products of your choice if your workshop is over $300. If your order is over $600 then you are able to choose another stamp set FREE from the Sale-a-Bration mini catalogue. Its amazing at how many free items you receive when you hold your own workshop. I know I was amazed when I held my first workshop. Please click on the link on the right to see what FREE stamp sets are available.

Monday, January 24, 2011

January Workshop Shimmer Mist

We had lots of fun and laughter at our January Workshop. I have shared my love for Shimmer Mist and Smooch Spritz to my lovely workshop ladies. It is amazing at just how different your project looks when you add a little Spritz or Shimmer Paint.

This is one of the cards we made. I have cased this card from Kristine McNickle using the kissing technique. I love the Medallion Stamp Set. There are so many uses for it.

I have used:
Stamp Sets: Medallion & Just Believe
Cardstock: Marina Mist, Chocolate Chip & So Saffron
Stamp Pads: Marina Mist & Chocolate Chip
Silver Foil Smooch Spritz & although you cant see it properly I have also used Champagne Shimmer Mist on the Medallion Stamp. First the Marina Mist on the Medallion Stamp then Shimmer Mist dabbed over the Marina Mist and then Just Believe (Chocolate Chip) stamp kissing the Medallion and placed onto cardstock.


The next card was using:
Stamp Set: Cottage Garden, Heard from the Heart
Cardstock: Melon Mambo, Basic Black, Whisper White
I used the Spiral Border Punch to make a negative effect.
I also made another card in Basic Black, Whisper White & Brushed Silver.


I love the Classic look of this card. I have stamped with Basic Black ink onto the flower of the Cottage Garden Stamp Set and then using a dauber to lightly dab Platinum Shimmer Mist onto stamp. I love the light and dark it presents. I also used Silver Foil Smooch Spritz before putting the card together. I used the Heard from the Heart Stamp Set for the wording.


I did a trial run with the Platinum Shimmer Mist onto the Medallion Stamp and put directly onto Basic Black Cardstock. I then stamped another scrap piece of Basic Black CS with Platinum Shimmer Mist but this time I put more onto the stamp. Using a 1 3/4" Circle Punch I cut out the centre and placed onto the centre of the Medallion with a Stampin Dimensional. I then decorated it with a Basic Rhinestone. Using the Platinum Shimmer Mist I dabbed over some Basic Black Grossgrain ribbon. It came up quite nice dont you think!


We also did this Classic Black and White card but not with the card opening up in the centre. For this one I used Basic Black & Whisper White Cardstock. I used White & Black Embossing Powder on the Lovely As A Tree Stamp Set. Before putting the card together I spritzed with Silver Foil Smooch Spritz. The sentiment was from the Just Believe Stamp Set. This card would be great for Birthdays, Fathers Day, Achievements etc. That tree reminds me of the tree of life and so there are many thoughts that run through my head when I see a tree like this. It reminds me of growing, nurturing and the lessons learnt. The tiny buds that grow into full fledged leaves. I am a lover of nature so I stop and smell the roses basically. I love to look at the unseen world you might say. The tiny pieces of this tree that are almost naked to the eye without a microscope.
Its our Grandaughters 14th birthday today and she wanted a pink birthday card. This was my first choice using the Medallion and the Platinum Shimmer Mist. I love the way the Shimmer Mist shows up and still leaving the colour of the Melon Mambo. As you can see I have used a sentiment from Heard From the Heart as I simply love this set. I have also used some Basic Pearls for the bottom of the card. These Basic Pearls are gorgeous and they come in three sizes. The smallest ones are so tiny and very handy for different projects. Well I decided not to use this card but made another using Basic Black and Melon Mambo cardstock. I used Basic Black on the Medallion Stamp and then went over it with Platinum Shimmer Mist with a dauber and stamped straight onto the Melon Mambo cardstock. Again I have used the Heard From The Heart Stamp Set and some black pearls that I had laying around. Unfortunately Stampin' Up! do not have the black pearls. Maybe oneday soon! I chose this one to give to our Grandaughter for her birthday. We had a lovely time at the park with her friends. Her mum organised to make Hamburgers on the BBQ that was available. We had a huge shelter and I brought the little gas oven with the kettle for us oldies who wanted their cuppas. It was lovely. The weather was on the cool side, quite amazing for this time of year. Only 26' and a few showers. The playground was huge so even at 14 the girls were off to play. Tonight we are off to the movies to watch Burlesque. I still cant believe our darling grandaughter is 14. Its scary! Happy Birthday Meg!
Please have a look for the upcoming dates for workshops held at my home. The lovely ladies always leave with at least three cards or a project and of course some afternoon tea and cake. The cost of the workshops are $15 and we have a lot of fun. If you are interested please feel free to email me and I can send you the details.
Thanks for popping by! :)

Tuesday, November 30, 2010

December Frenzy AND Summer Mini are on!!!

Click on the icon on the right side to see what specials Stampin' Up! have available during the month of December. Fantastic products for up to 50% off retail price.
Also starting on the 1st of December is the lovely new little Summer Mini Catalogue which runs through to 31st March. There are some lovely products in this years Summer Mini. Please check the catalogue out by clicking on the icon to the right side of the page.
Thanks for popping by & happy stamping!

Thursday, November 25, 2010

December Frenzy

Hello fellow stampers! Are we in for a treat? I am so excited that we have a new special coming up with December Frenzy which runs from 1st-29th of December. We have selected items that are up to 50% off. Some of them new stamps this year so have keep an eye on this spot after December 1st to see what Stampin' Up! have in store for you.


Well we had our first workshop since arriving home from holidays. It was nice to get everyone together again and hear the fun and laughter amongst themselves. We made a Christmas Meander Album and I was so surprised at how quickly everyone completed their album. They all looked gorgeous and I had one lady who has never made a card before and she managed to make her album without any bother. Actually I didnt know until the end that Debbie had just made her first project. Well done Debbie! I am sure Debbie will get the bug and be addicted to stamping very shortly like us all. Here is my example which I demonstrated for this years Stamp Camp. The lovely Beate Johns came up with the design of the Meander Album. It is very small and is made by using only 1 piece of DSP. It is the way you cut the DSP and fold it that you come up with the album. You then have the front and back cover. I am going to make one with my favourite sayings. I printed the photos from Kmart where you can do a collage of up to 7 photos at one time to get your small prints and they only cost .25c each. A wonderful way of showing off your favourite photos.
I was asked tonight if I would make sympathy card for someone. Here is the card I made. I got the idea from a card we made at last years stamp camp which was done by Lynda Winfield. We made it with butterflies. The actual flower is Vellum embossed with White Embossing Powder and using a heat gun and then cut out and mounted on Stampin Dimensionals. The card is A5 size so that it is big enough for everyone to sign it. I think it turned out pretty well.


Also I have made up a very quick and easy card for Christmas. It is using the Sparkly and Bright stamp set from the new catalogue. I have used Cherry Cobbler and Whisper White cardstock. I have also used the Polka Dot Embossing Folder. I used the 1 3/4" circle punch to punch the front of the card to show the cute little reindeer which was stamped on the inside along with a sentiment which you cannot see until you open the card.

I have been busy making little gifts for Xmas with the Top Note Die Cut. These little bags are very quick and easy to make. I used the Large Oval Punch for the hole and then tied it together with ribbon. I bought some bags to tape inside and then all I need to do is make my little sweets to pop inside.
Its getting late and I have to work tomorrow so I had better call it a day. Remember to have a look at the specials coming up in December. Thanks for popping by!